First Upholstery Project – Dining Room Chairs
- Carrie Macioce
- Oct 10, 2014
- 3 min read

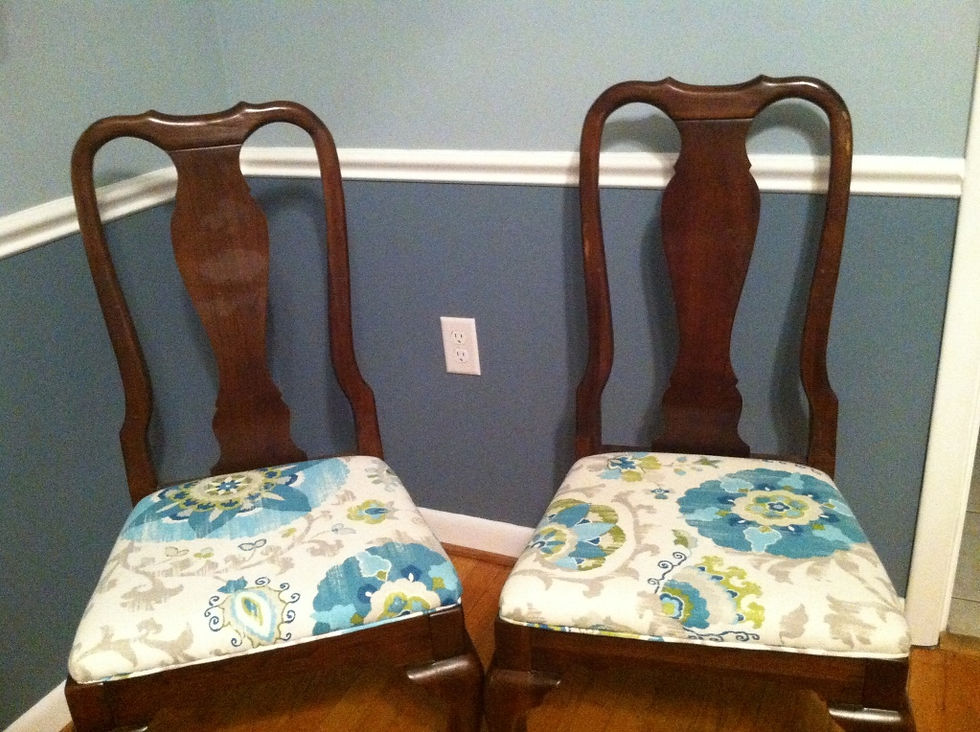
During the downtime before the new slider project I upholstered the dining room chairs. I’ve had them for a few years and always planned on changing the fabric and had been keeping an eye out for the right fabric. With the blue dining room walls I wanted to add different colors into the mix but also wanted a fun, lively pattern to make the room feel less formal. I landed on this one from an Etsy shop but I have since seen it a bunch of other places.

I had to get a few other supplies like batting, welting cords, staples, and fabric to cover the back and I was ready to go! I totally thought I’d be able to bang this out relatively quickly… not quite!

This was my first attempt at upholstering something so I paid close attention when I was taking the cushions apart and snapped photos of how it was put together so I could try to replicate the technique.


And let me tell you I took a shit load of staples out of 6 chair cushions (that picture isn’t all of them)!! But after doing this project I know why there are some many when you want it to fit tightly and you have multiple layers. This was a step I hadn’t considered would be a time suck but for 6 chairs it took a good chunk of time.

I used the old cover as a template (really just with the first one or two, by the time I got to the others I had a good idea of the shape that was needed).

And I added some fresh batting (the fabric isn’t upholstery grade so it was more see through with the white background and this helped hide the yellow cushion… plus they’re old so a little extra cushion isn’t gonna hurt!).

Then it was time to add the fabric! I worked with opposite sides of the chair pad once I got one side stapled so there was resistance when I pulled it tight. It was a little tricky to get everything pulled tight because of how I pushed down on the staple gun but after a few times I figured out what worked best for me and got into a rhythm. And the first one didn’t turn out too shabby!!


Time to go into production mode (well actually I didn’t do all 6 in one day)!! And I will tell you my forearm was a little tight after doing this project, it was not used to the staple gun work-out!


I had to borrow a sewing machine to complete the welting step, this was also a first for me. The sewing was actually pretty easy (once I figured out how to operate the machine) since it was a straight line and the wrapping and pinning of the welting is what took the most time.


Then it was time to break out the staple gun again (this was the 3rd layer I stapled)!! The corners were a bit tricky (again used an old piece as a guide) and so was making sure you didn’t have the welting too far under edge of the cushion but after a few you figure it out.

The old welting was also a good guide on how to finish it off nicely and tuck it into itself.

And here’s the finished welting (after I trimmed the excess fabric and batting)! 1 down, 5 more to go!

One last step (layer number 4!) I added black fabric to the back. I didn’t cut it perfect or put a tone of staples (I honestly probably didn’t need to do it at all) but it gives it a more finished looked I guess.

I’m really glad I took the time to add the welting because it really does make for a nicer finished product (left pic without, right pic with). Getting the screws back into the chairs was sometimes a challenge, luckily I didn’t cover up any holes during this process though there were 1 or 2 that were close!

I was really happy with how my first upholstery project turned out, considering 6 chairs wasn’t exactly a “small” project… though I’m sure you’re noticing we don’t really start “small” around here! I worked on these periodically over the course of 12 days before they were all done, but it was awesome to see how they turned out and how they changed the look of the dining room! Not quite so stuffy anymore!


Comments